I have found the Hasbro View-Master VR to be a very serviceable Cardboard device. The fact that it simply flips open without any velcro and that it’s not made of literal cardboard are big plusses, and the face-gasket is rubberized, which borders on actually being comfortable.
However, it does not feature any openings for earbud or data cables, understandably as it’s meant to be light-tight, and most users probably aren’t using it while hooked up to their computers. When developing on Cardboard with a dedicated test device, it’s nice to be able to test any VR apps as they are meant to be used, in a Cardboard device, so I decided to make a quick modification to not only allow a data cable to remain connected while it’s closed, but also add in a port for earbuds.
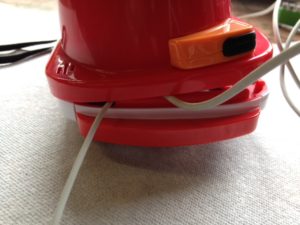
I have set mine up for an iPhone 5. Naturally the placement of any cuts may differ for other mobile devices. Also note that depending on how closely your cuts conform to the shape of your cables, there may be a little light leakage from the new holes. However, I was pretty loose with my cuts and still find the leakage to be negligible, especially considering that one’s right hand is typically covering the holes when using it anyhow.
Tools you will need:
- Phillips Screwdriver
- Dremel
- Safety Glasses
- Marker
Optional:
- Vise
- Small File
- Tissue/Paper Towel
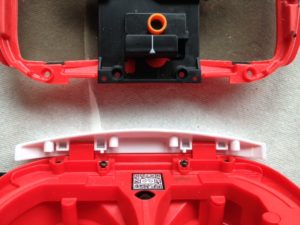
First separate the halves of the View-Master by removing the four screws that hold the hinge in place. This will make operating on the device halves much easier.
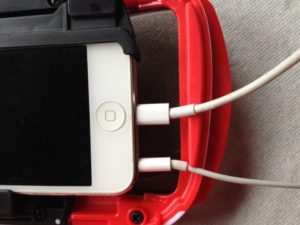
Plug in your cables while your mobile device is mounted in the View-Master if possible to see where the cuts will need to be made. If the cables cannot be plugged in while the mobile device is in the View-Master, lay the cables over the ports to eyeball it.
Use a felt marker to indicate the size and location for the holes. You may notice at this point that the inner lip of the front half is made of rubber, while the rest of the device is plastic.
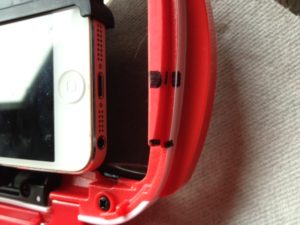
Fit the two halves back together and use the marks on the front half to see where to draw aligning marks on the outside of the back half, which should be roughly the size of a cross-section of the cables themselves.
Separate the halves again. If you have a vise handy, use it to hold the View-Master. You may wish to also use a tissue or paper towel to cover the inside of the device to prevent bits of rubber or plastic from falling into it.
Using your Dremel and pretty much any cutting disc, carefully carve away the rubber lip where indicated by the marker. Try cutting it a bit smaller than the cable’s width at first, since the rubber can stretch to accommodate the cable. Do not cut into the white plastic unless necessary to accommodate your cable placement.
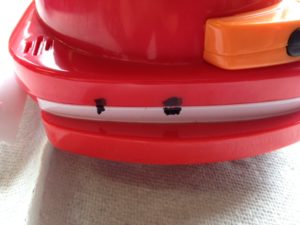
Do the same for the red plastic outer lip on the back half. This cut would benefit from being slightly larger than the cable to reduce the possibility of pinching it when closing the device. I also beveled the edges of mine a bit to further reduce the chance of pinching.

You may want to use a small file to get rid of the hanging bits of plastic and smooth or shape the edges.
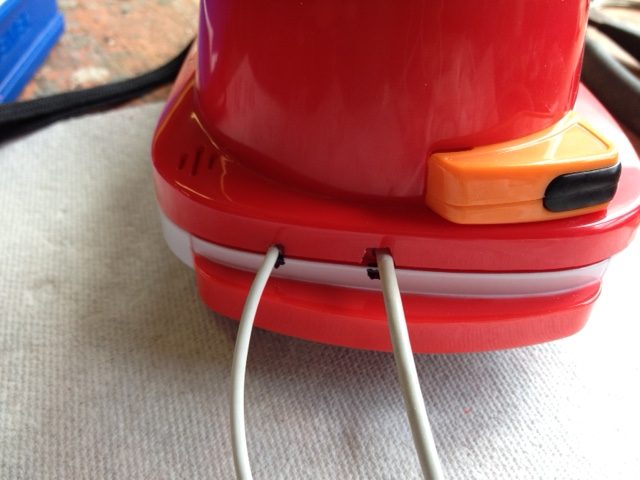
Repeat this process with the earbud hole (I had to simply carve away the side of the rubber lip a bit to fit this cable). Screw the two halves back together and you’re done! Your very own View-Master brand Google Cardboard dev kit!
Hope that helps anyone trying to come up with a decent Cardboard development solution. I’m finding that it’s saving me a fair amount of time on iterations the long run not having to open the device or fiddle with cables. I can also use it to view other VR apps with earbuds to boot.